
In the realm of interior design, few trends have captured the imagination of homeowners quite like the open concept kitchen and floor plan. Characterized by spacious, interconnected living spaces that flow seamlessly from one area to the next, open concept homes have become increasingly popular in recent years. Yet, as with any design choice, there are both advantages and challenges associated with embracing this modern approach to living.
Advantages of Open Concept Living:
1. Increased Social Interaction:
One of the most notable advantages of open concept living is the fostering of social interaction. By removing physical barriers between the kitchen, living room, and dining area, these spaces become more conducive to conversation and connection. Whether you’re hosting a dinner party or simply spending time with family, open concept layouts encourage people to come together and engage in meaningful interactions.
2. Enhanced Natural Light:
Another benefit of open concept homes is the abundance of natural light that floods the space. With fewer walls to obstruct sunlight, rooms feel brighter and more airy, creating a welcoming and uplifting atmosphere. This not only contributes to the overall aesthetic appeal of the home but also has potential health benefits, such as improved mood and increased vitamin D absorption.
3. Flexible Design Options for an Open Concept Kitchen:
Open concept floor plans offer unparalleled flexibility when it comes to interior design. Homeowners have the freedom to configure the space according to their unique preferences and lifestyle needs. Whether you prefer a minimalist aesthetic with clean lines and neutral colors or a more eclectic vibe with bold patterns and statement pieces, an open concept layout provides the perfect canvas for expressing your personal style.
4. Better Utilization of Space:
By eliminating unnecessary walls and partitions, open concept homes make more efficient use of available space. This can be particularly advantageous in smaller dwellings where every square foot counts. Without the constraints of traditional room divisions, homeowners can maximize functionality and optimize the flow of their living environment.
Challenges of Converting to an Open Concept Kitchen:
1. Structural Considerations:
Converting a traditional home to an open concept layout often involves structural modifications, which can be complex and costly. Load-bearing walls may need to be removed or reinforced, and existing plumbing and electrical systems may require reconfiguration to accommodate the new layout. It’s essential to work with experienced professionals to ensure that these changes are made safely and effectively.
2. Privacy Concerns:
While open concept living promotes social interaction, it can also present challenges in terms of privacy. Without walls to provide separation between different areas of the home, noise and visual distractions may become more pronounced. This can be particularly problematic in households with multiple occupants or in situations where individuals require quiet spaces for work or relaxation.
3. Limited Storage Options in an Open Concept Kitchen:
One potential drawback of open concept living is the lack of defined storage areas. Without dedicated closets or cabinets to conceal clutter, maintaining a tidy and organized space can be challenging. However, this issue can be mitigated through strategic furniture placement, built-in storage solutions, and creative organization techniques.
4. Heating and Cooling Considerations:
With fewer interior walls to provide insulation, open concept homes may experience challenges with heating and cooling efficiency. Temperature regulation can be more difficult to achieve, leading to potential energy waste and increased utility costs. Implementing zoning systems or investing in energy-efficient HVAC equipment can help address these issues and maintain comfortable indoor conditions year-round.
In conclusion, open concept living offers a myriad of benefits, from fostering social interaction to enhancing natural light and flexibility in design. However, converting a home to an open concept layout comes with its own set of challenges, including structural considerations, privacy concerns, storage limitations, and heating/cooling considerations. By carefully weighing the advantages and challenges and working with experienced professionals, homeowners can create a functional and inviting living environment that reflects their unique lifestyle and preferences. Whether you’re drawn to the spaciousness and connectivity of open concept living or prefer the coziness of traditional room divisions, the key is to design a space that meets your needs and enhances your quality of life.
As homeowners embark on the journey of transforming their spaces into open concept layouts, they often encounter challenges along the way. One common hurdle is the difficulty of patching floors when removing walls to create a seamless flow between rooms. In the next part of this blog post, we’ll provide a step-by-step breakdown of the entire process, complete with helpful pictures, to guide you through the intricacies of this renovation endeavor. From initial demolition to final refinishing, we’ll walk you through each stage, offering practical tips and insights to ensure a successful transition to open concept living.
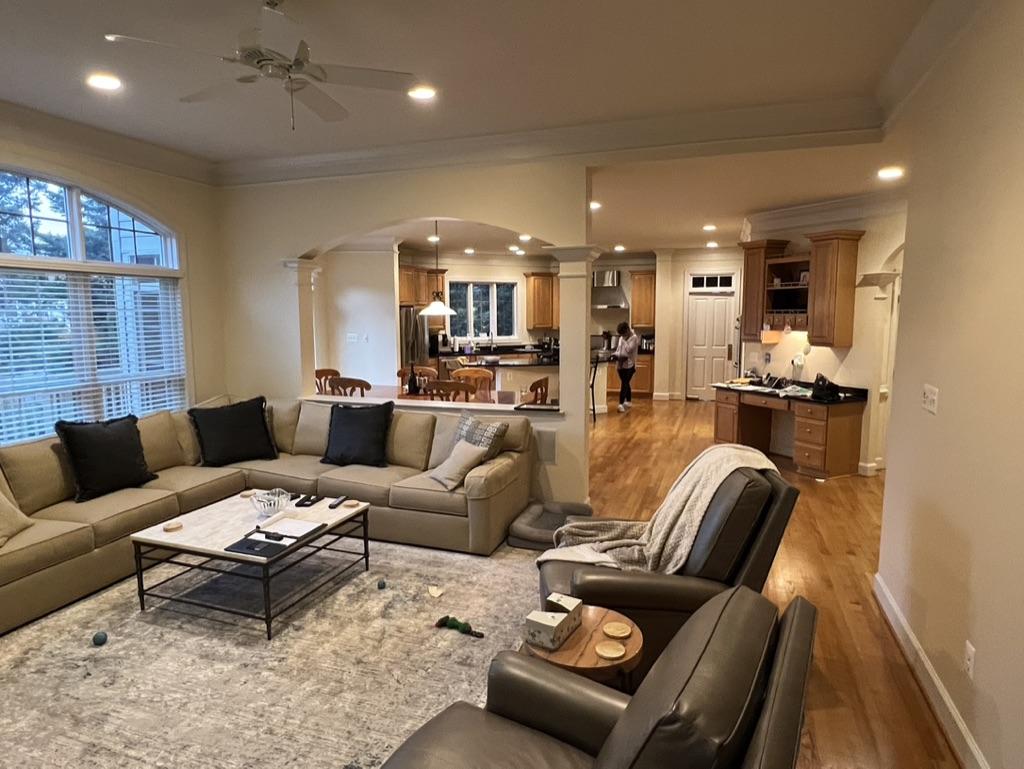
Step 1: Starting Point
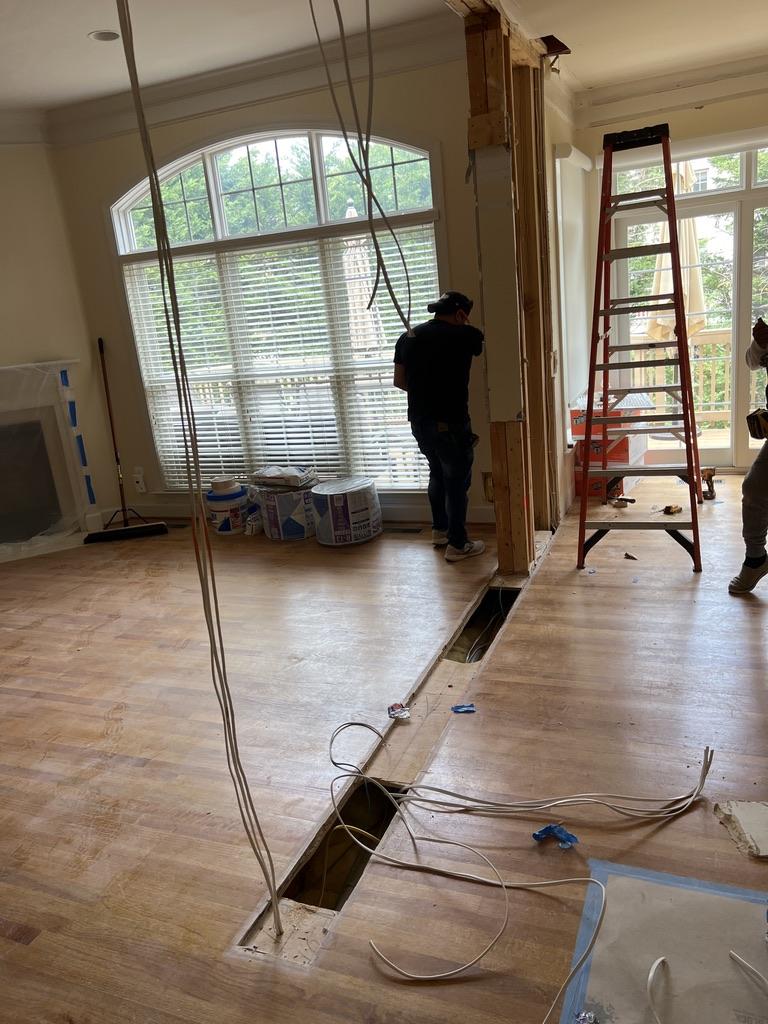
As the starting point for an “Open Concept Kitchen” this circa 2000 adjoining family room with its archway pass-thru was already fairly open.
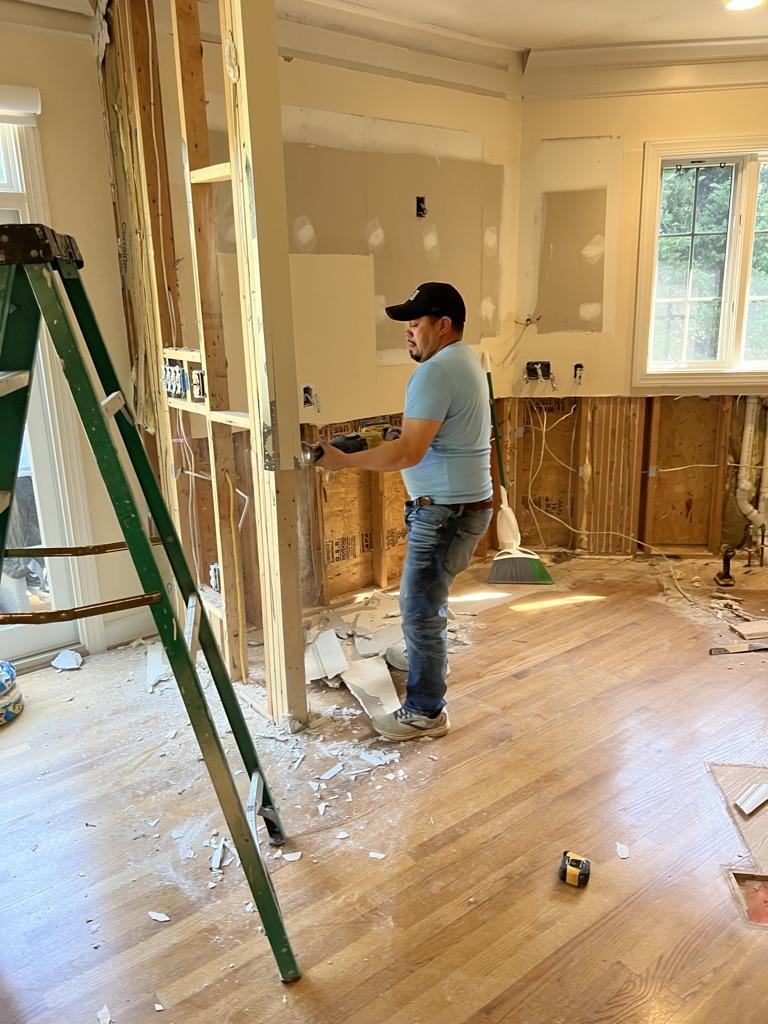
Step 2: Demo Day
One of the first questions we ask a prospective Open Kitchen client is “what are your plans for the floor”? The reason is simple, removing even a non-load bearing wall leaves a hole in the installed flooring. Here’s what this oak hardwood floor looked like after the wall was removed.
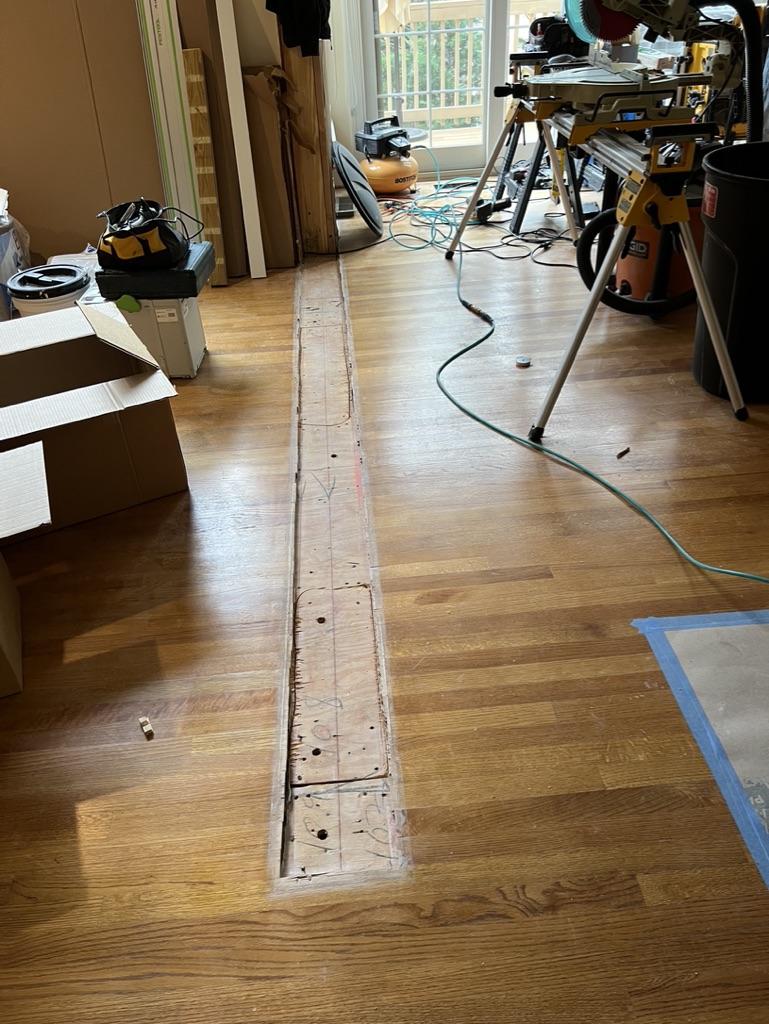
More on our creative flooring solutions in a minute.
Before we begin the demolition on a supposed “non-loadbearing wall”, we double check the structure of the house to confirm our design assumptions. Then as we begin our demolition, we “listen” to the house and what it tells us. If we cut through the studs of a wall and it goes easy like this one, then we were right that it’s not a load bearing wall.
To the contrary, if the Sawzall blade binds up halfway through a stud like it did on the archway wall, we know we have a problem that needs investigation before we can proceed. What we initially found above the archway was a double I-joist supporting a bedroom wall above the family room.
Step 3: Make Sure to Maintain Structural Integrity
So far, so good, this is the correct structure as we would have expected. Digging further, on one end of the double I-joist was a steel joist hanger off a double laminate beam.
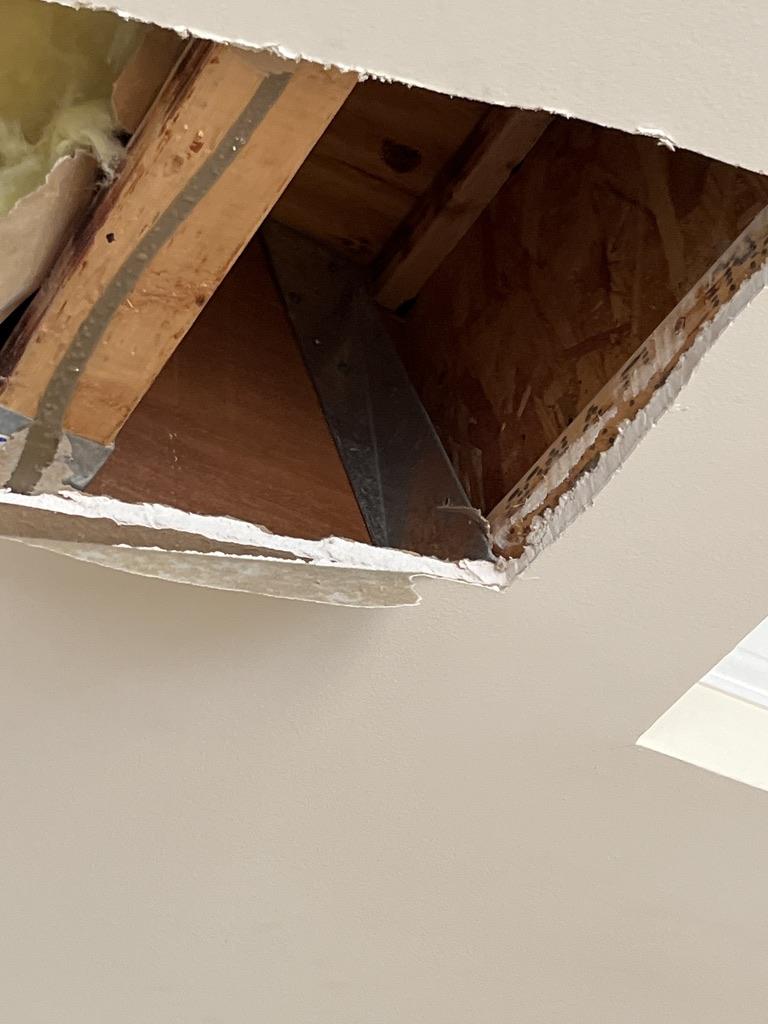
Again, this was exactly the correct structure for this house design. So why did the Sawzall bind up from excess load in the wall studs? On the other end of the double I-Joist the builder forgot to install the required joist hangers, making this woefully inadequate wall a load bearing wall for the last 20 some years. We solved the problem by installing a laminate Power Post under the double I-joists with blocking underneath to tie the load back to a basement concrete wall.
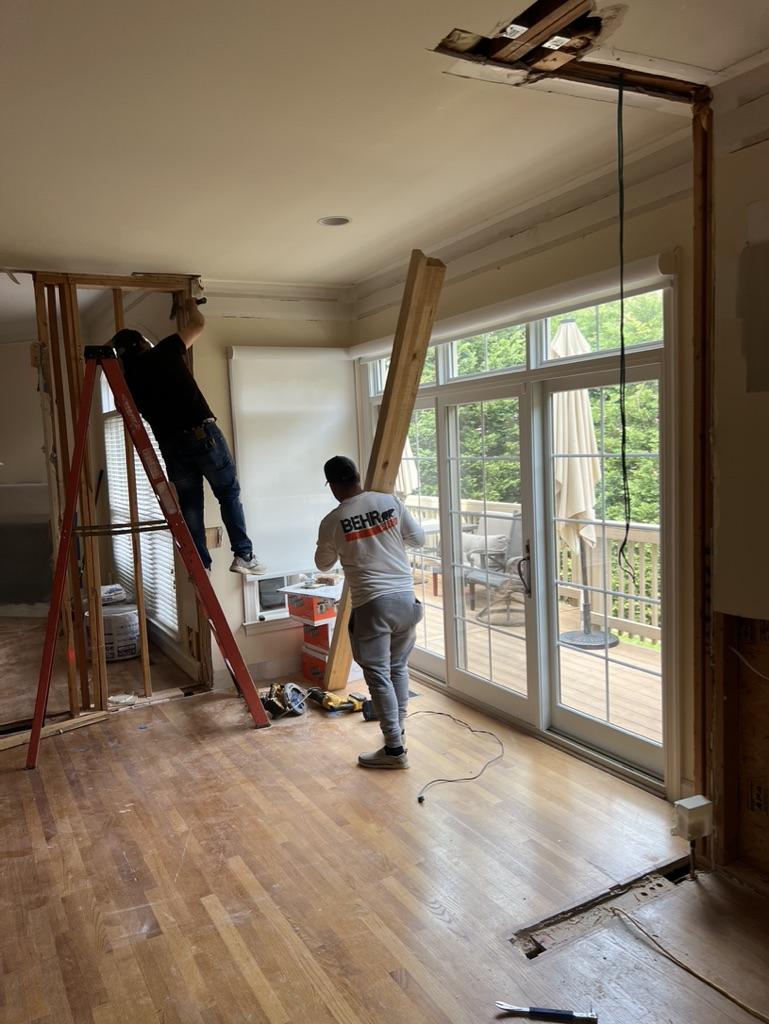
Just because a house was inspected during its initial construction, that doesn’t mean it was built correctly. As a former Structural Engineer my experienced Team and I leave nothing to chance when we create an “Open Concept Kitchen”.
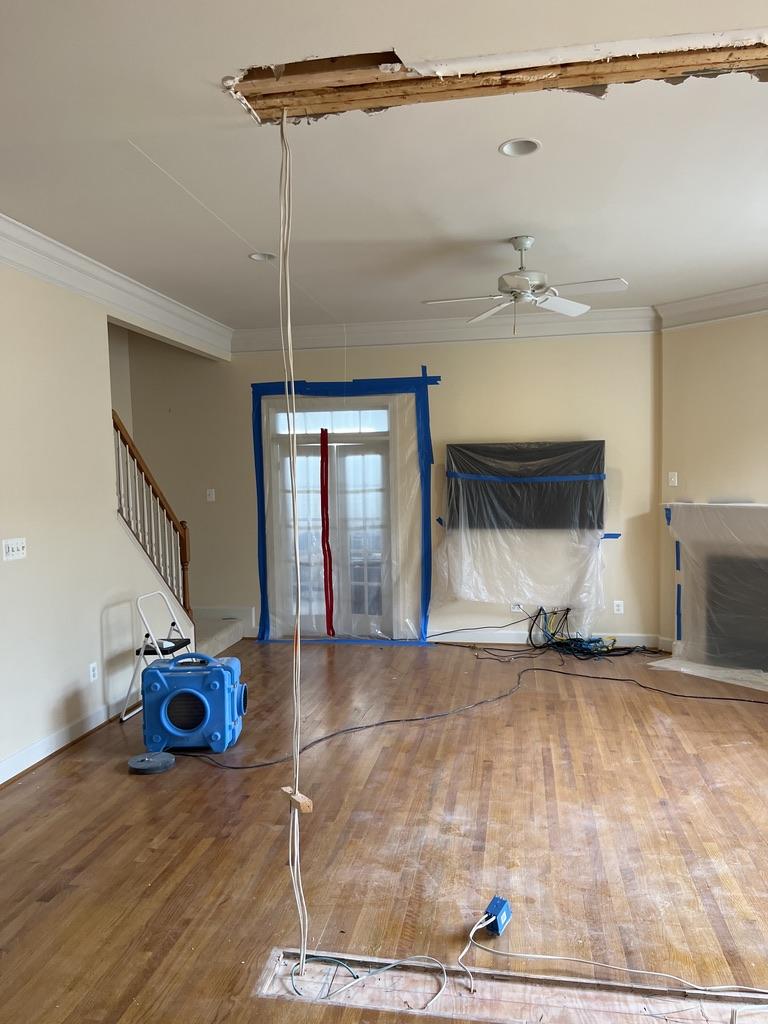
Step 4: Deal with the Electrical
So now that the pesky wall is gone, what about all the wires that were traversing through the old wall?
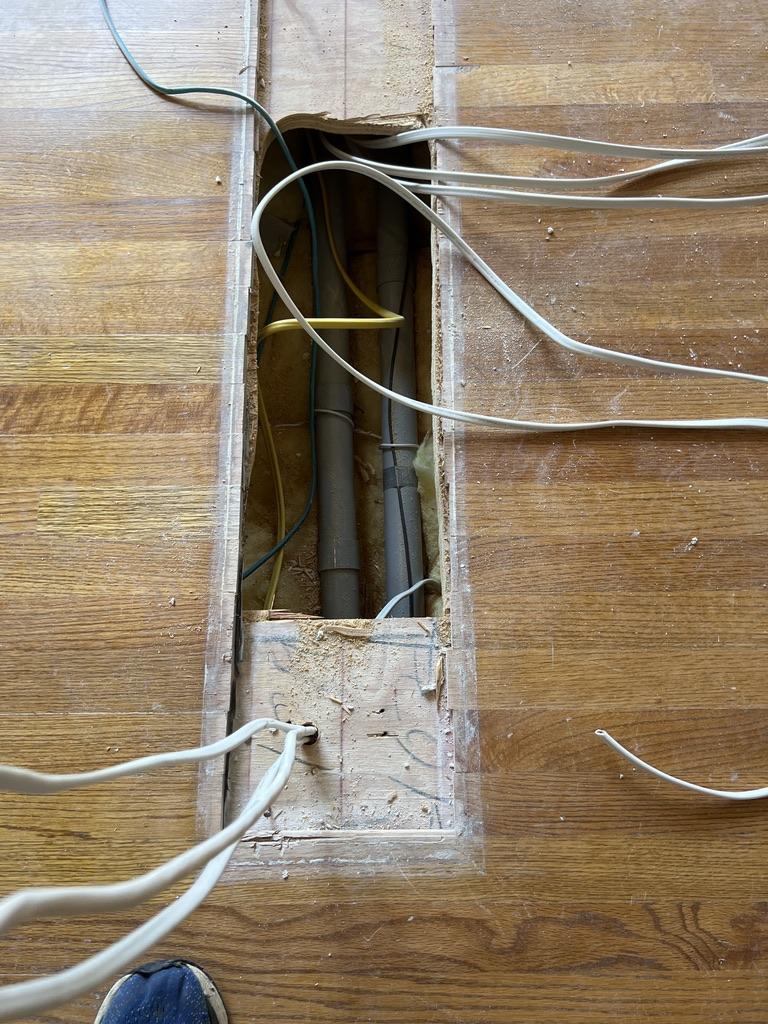
Basically we have to splice into these wire runs and route them around the wall we just removed.
That means we have to install a junction box in the basement ceiling below the old wall and then another junction in the ceiling above the old wall to splice with wires to route tham around the old wall. According to the National Electric Code (NEC) these junction boxes have to be accessible, they can’t be buried inside the walls. That means a small white cover plate is visible in the finished drywall. We tell our clients that you’ll notice it for about a week after the project is done and then never think about it again.
Step 5: The Weave
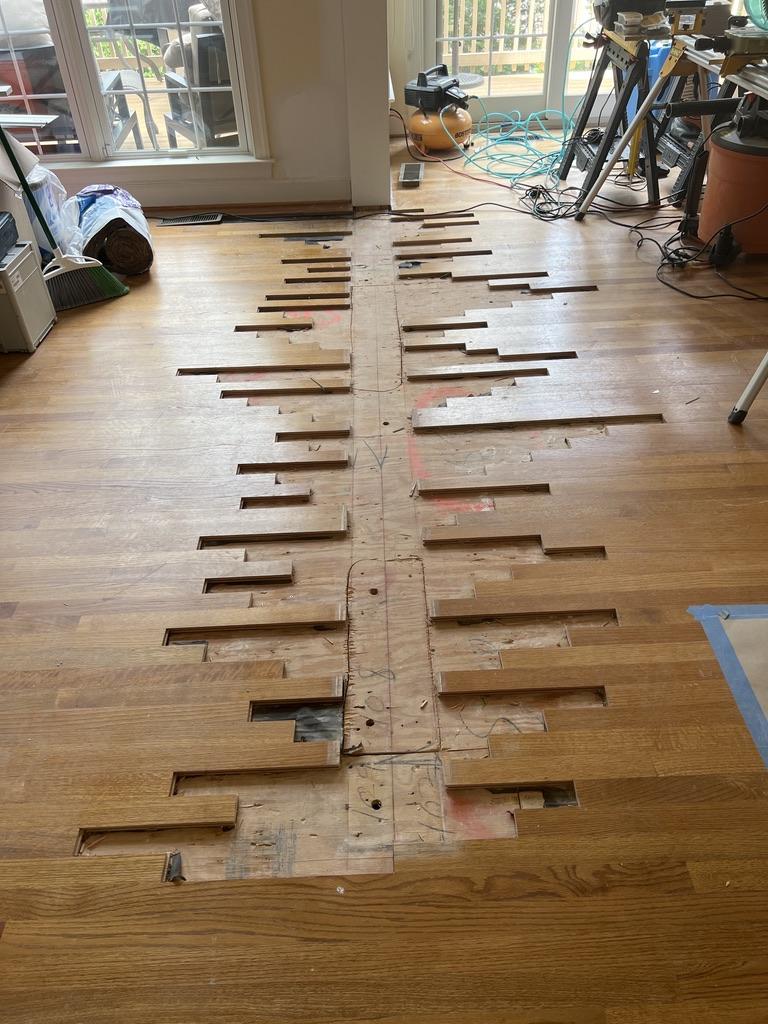
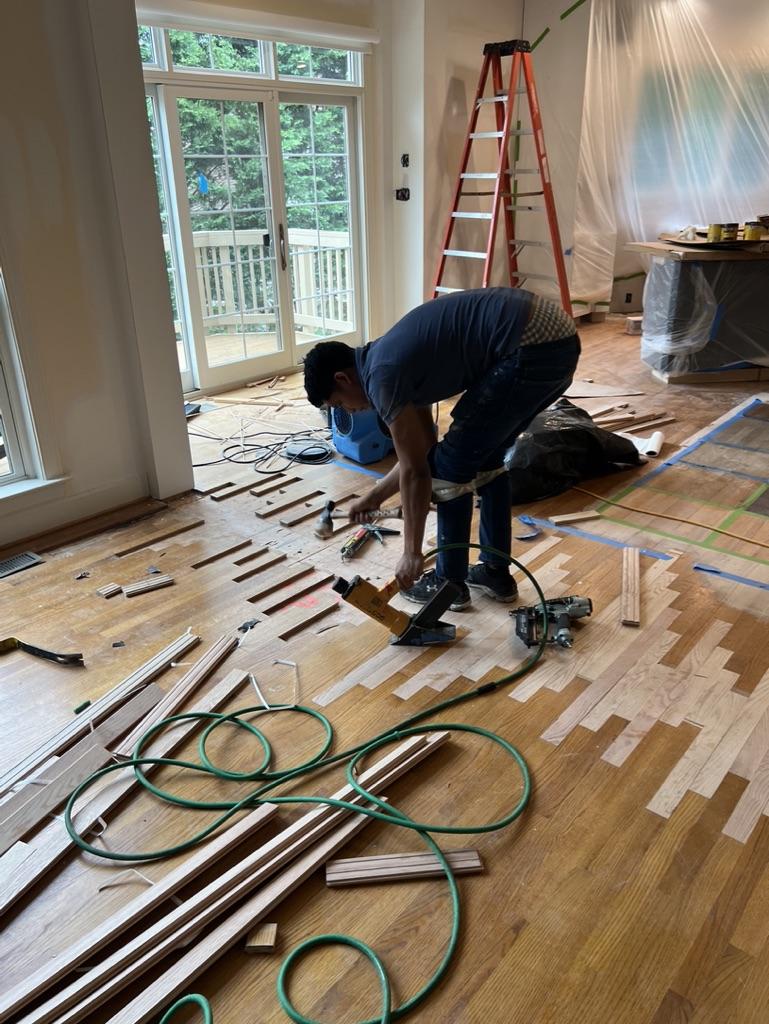
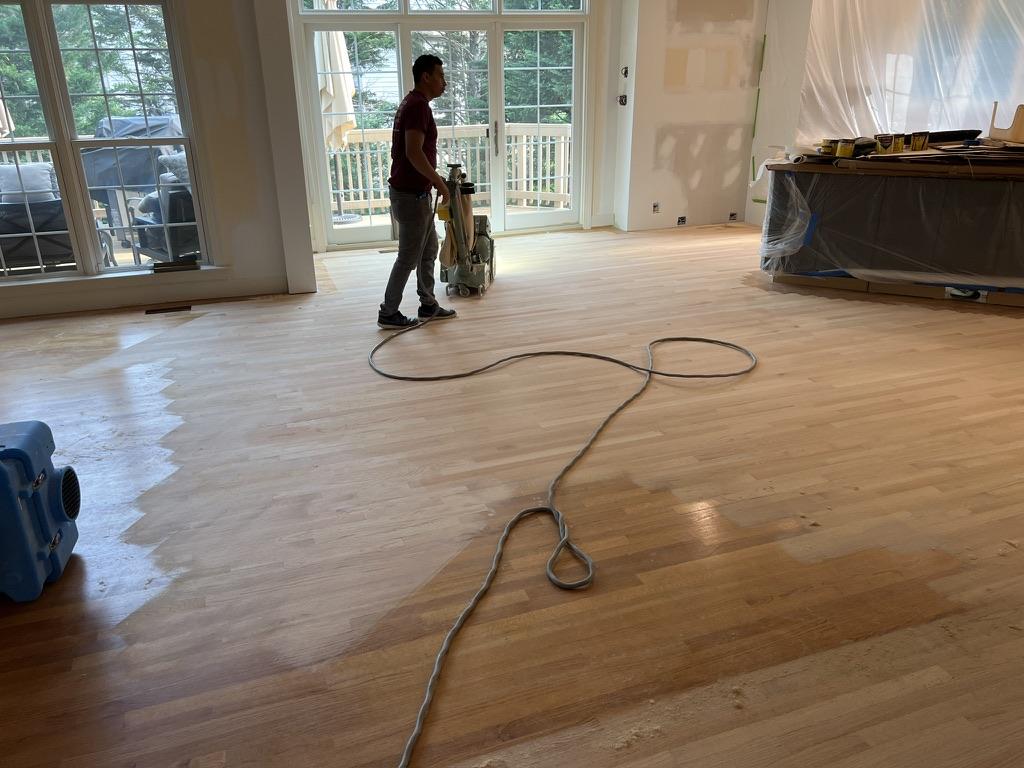
Getting back to the flooring question, this client loved the idea of hardwood flooring, but wanted to update the look of their house with their new kitchen. What we proposed was to refinish the red oak floors rather than replace them at 3 times the expense. So what about the holes left from removing the old walls? You can’t just patch the holes alone with new hardwood, that looks terrible when inexperienced contractors take that shortcut. What we do is a painstaking process that we affectionately call “ the weave”.
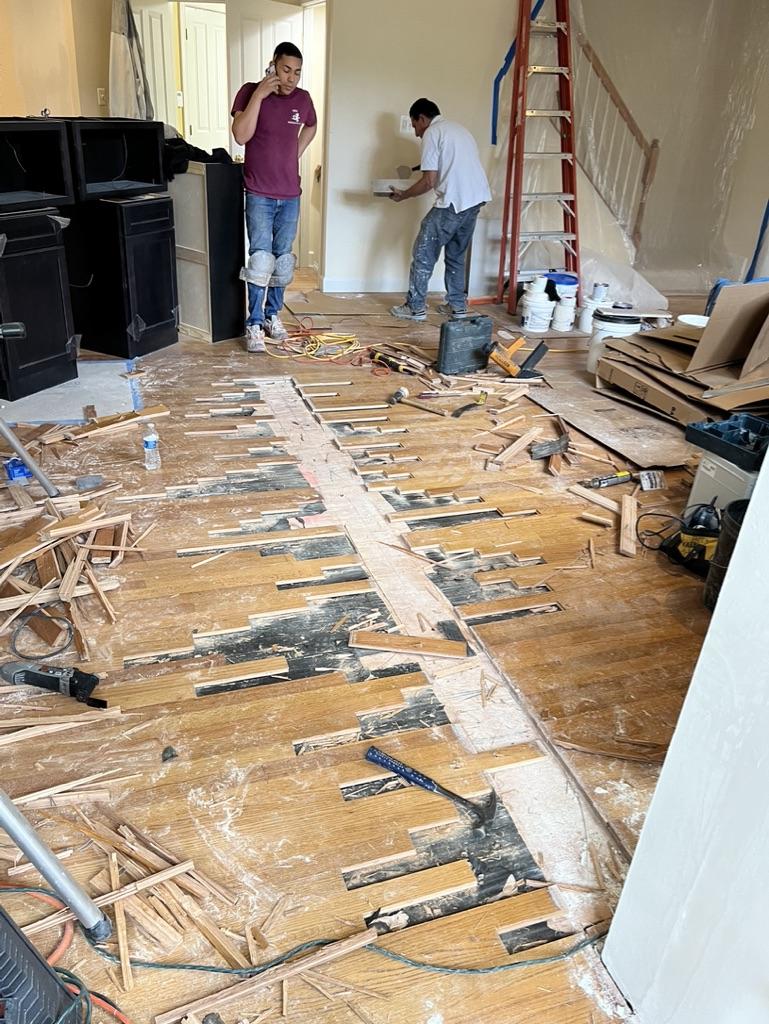
The “weave” means removing boards at random lengths along the old wall outline, and then replacing them with new boards cut and spliced back into the open slots.
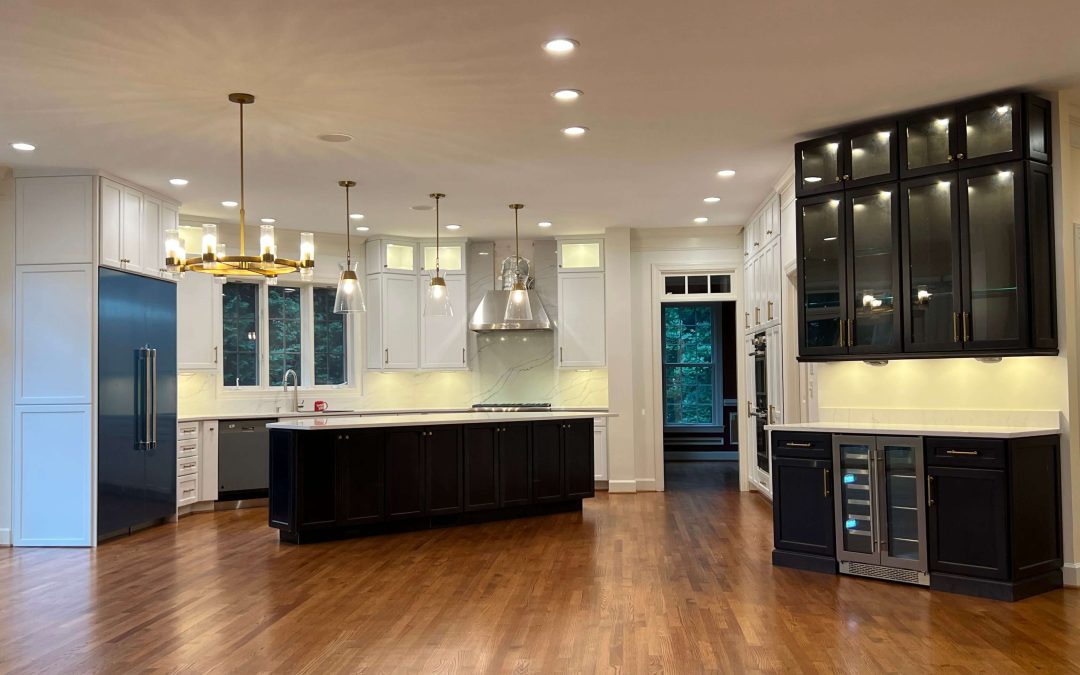
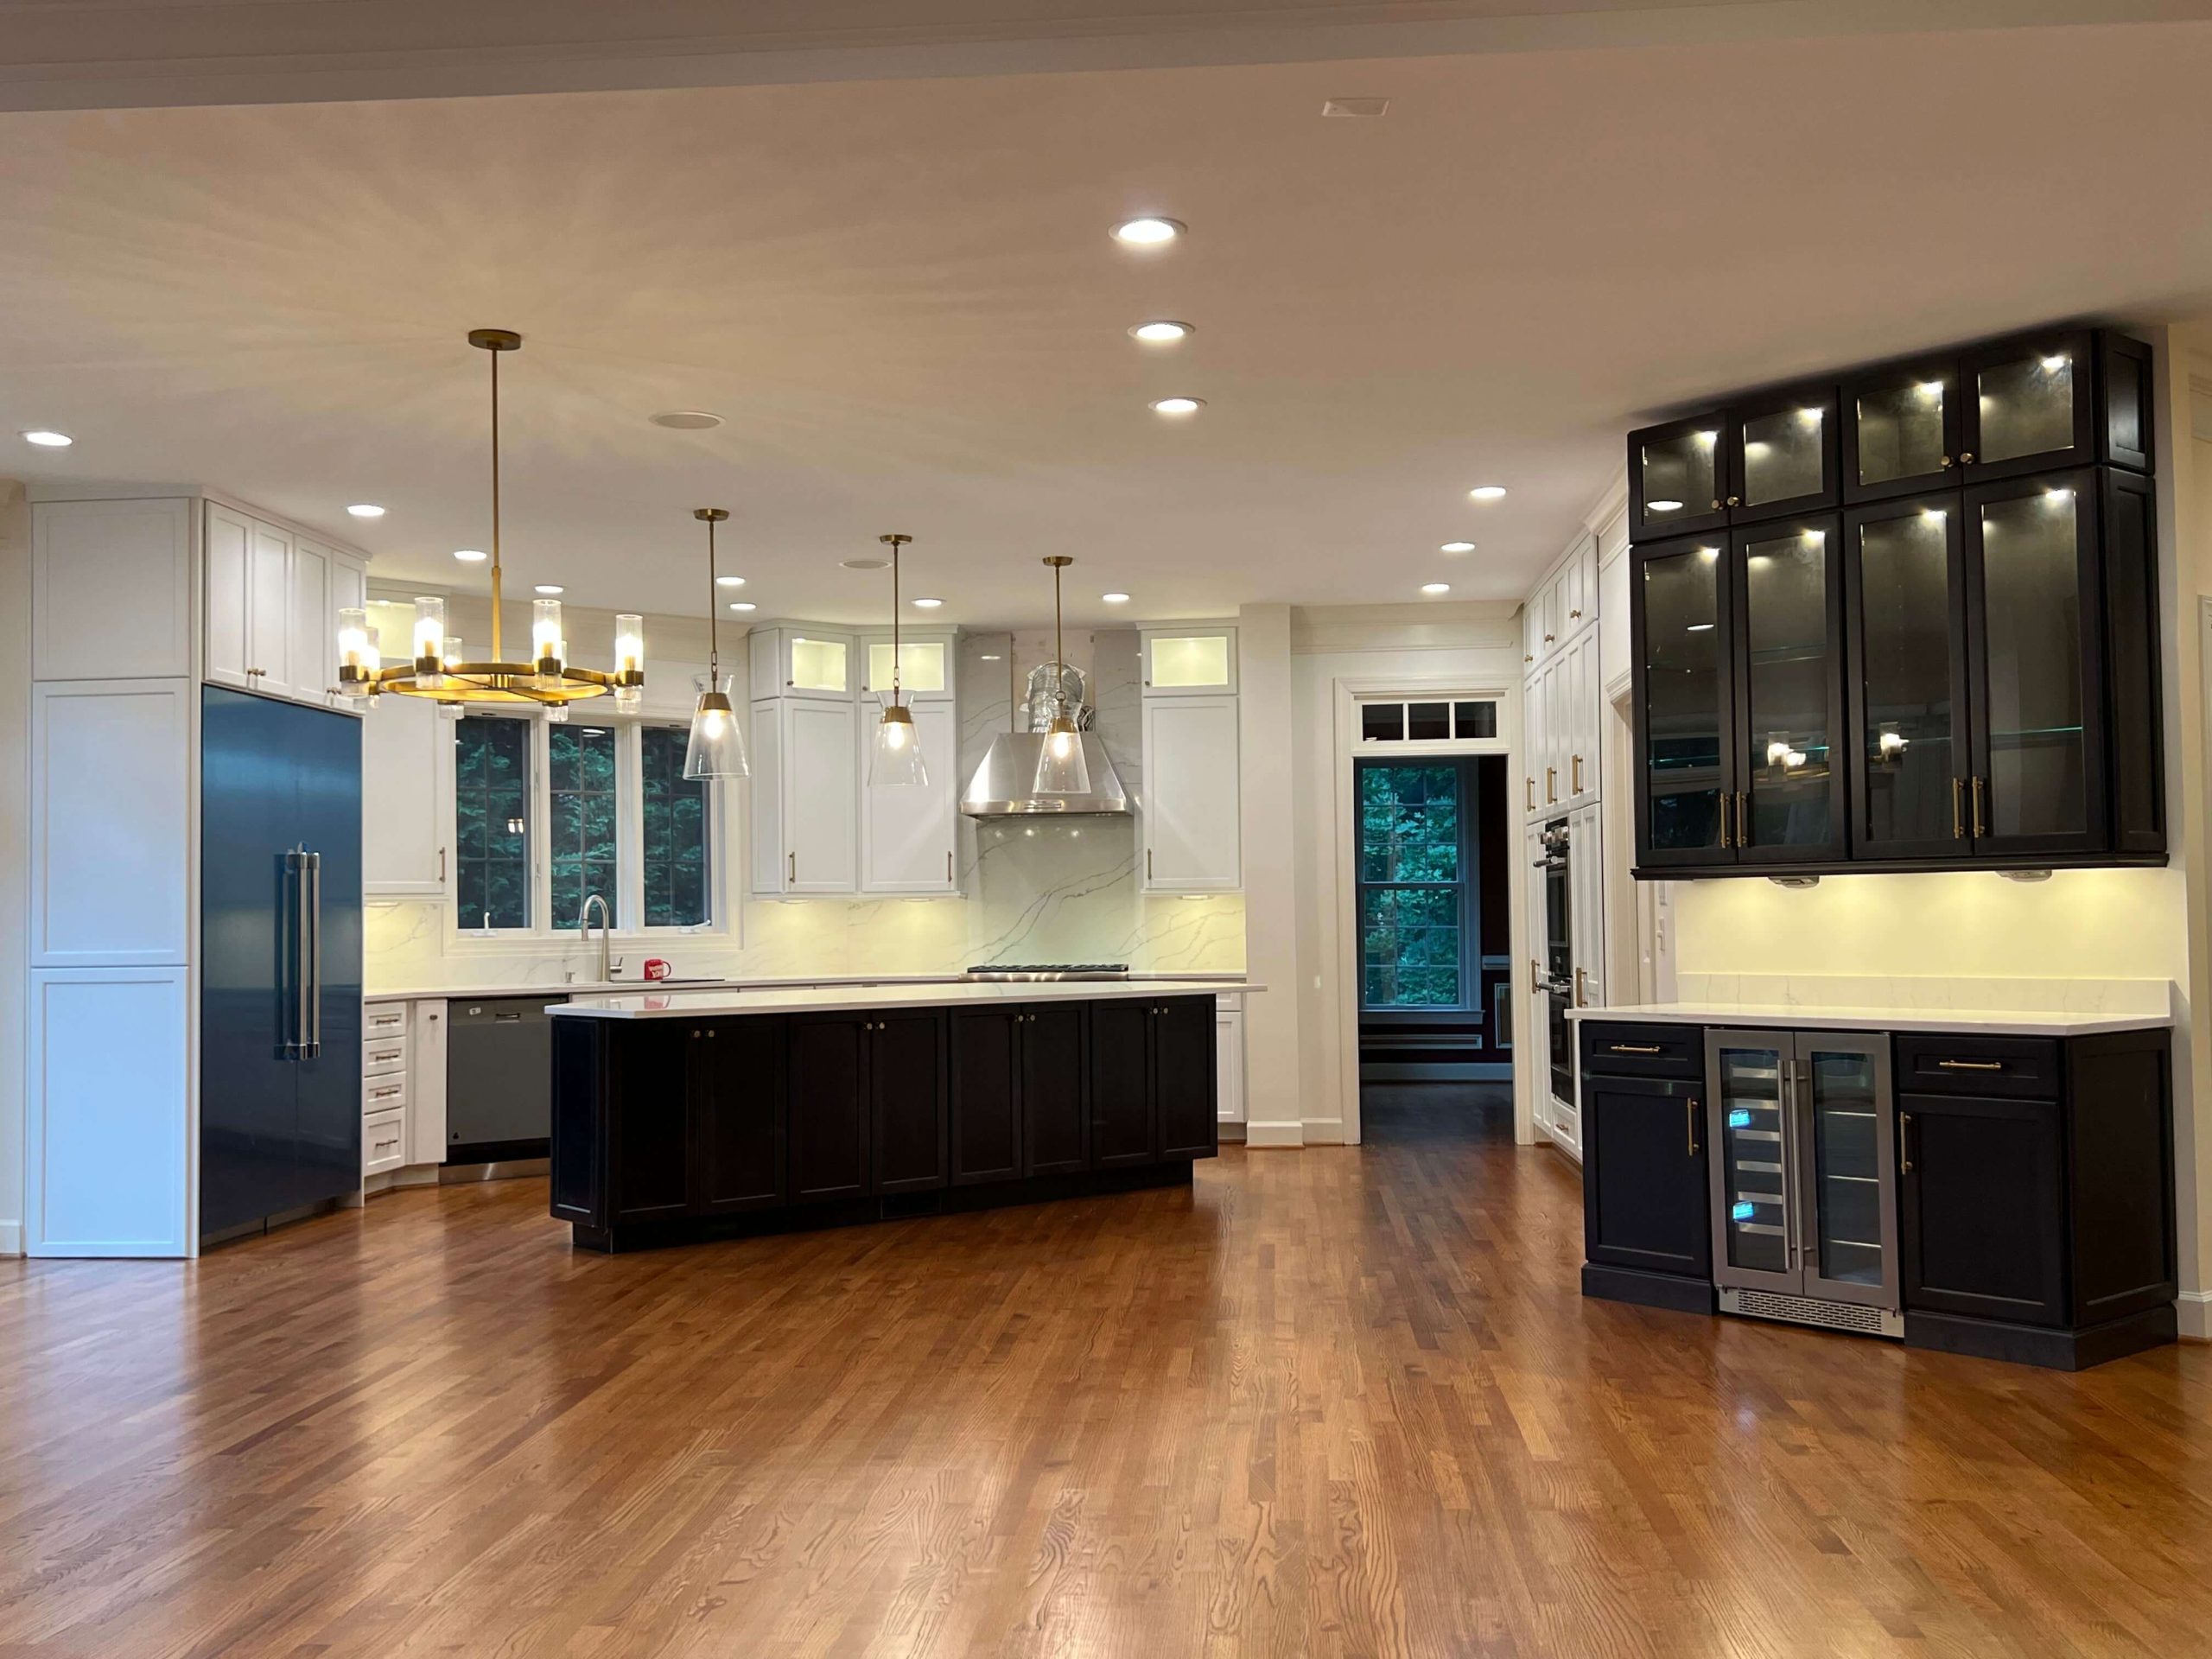
Step Six: Finish Off the Open Concept Kitchen
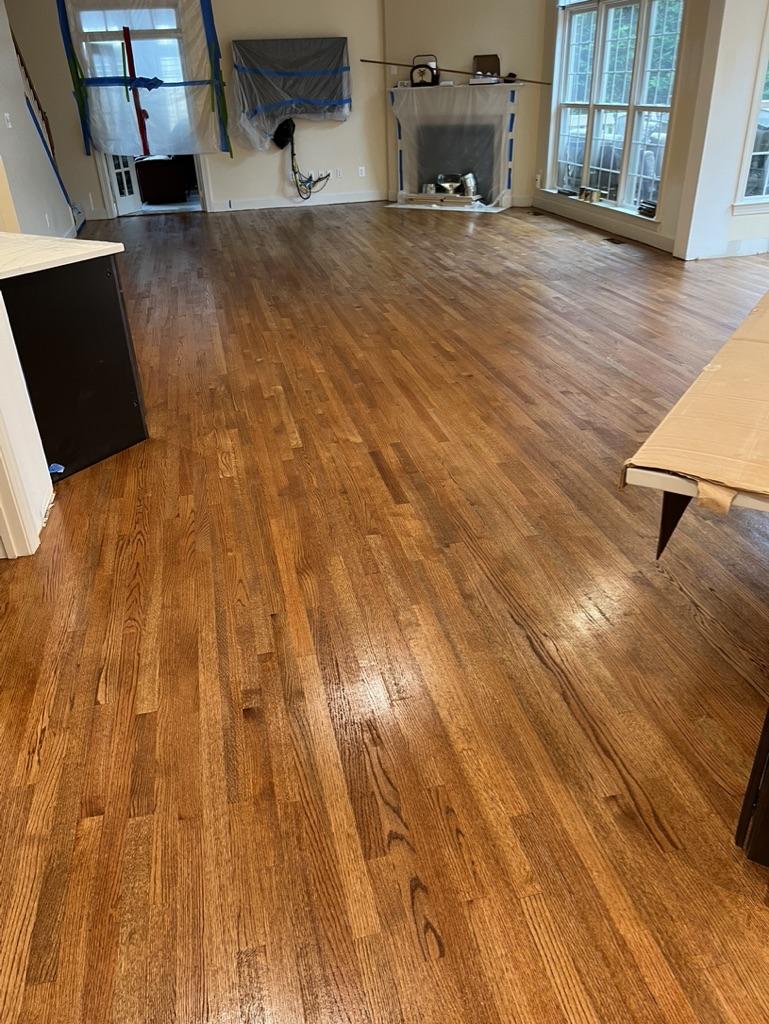
Once this section of old and new boards is sanded down and then refinished, the last remnants of the old archway wall disappear and an Open Kitchen takes its place.
The last remnants of the old archway wall disappear and an Open Kitchen takes its place.
Almost everyone today loves the idea of an “Open Concept Kitchen”. The question becomes which Contractor do you trust to make your dreams a reality? At Renewal Homes we have the experience and the artisans that it takes to make your dreams come true. Ready to start opening up your home with the help of the team at Renewal Homes DMV? Reach out today.